> ## Documentation Index
> Fetch the complete documentation index at: https://docs.routerlink.ai/llms.txt
> Use this file to discover all available pages before exploring further.
# Roo Code Plugin
> This documentation is provided for informational purposes only and demonstrates how to configure and use our API with third-party AI chat interfaces. Any third-party software, websites, or services mentioned are not operated, controlled, or endorsed by us.
 # **Introduction to Roo Code**
**What Can [Roo Code](https://github.com/RooCodeInc/Roo-Code) Do For YOU?**
* Generate Code from natural language descriptions and specs
* Adapt with Modes: Code, Architect, Ask, Debug, and Custom Modes
* Refactor & Debug existing code
* Write & Update documentation
* Answer Questions about your codebase
* Automate repetitive tasks
* Utilize MCP Servers
# Step
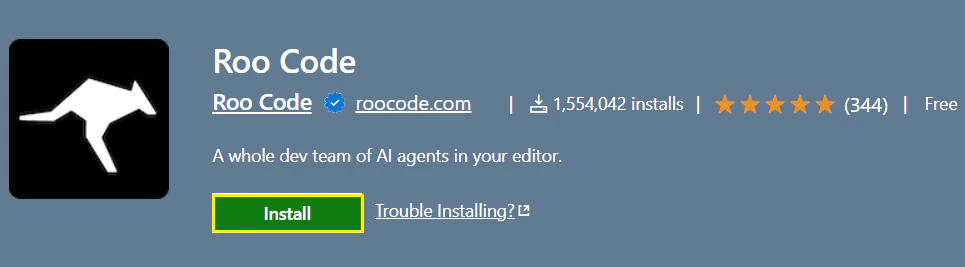
**Install** the [Roo Code extension](https://marketplace.visualstudio.com/items?itemName=RooVeterinaryInc.roo-cline) from the [**VS Code**](https://code.visualstudio.com/download) Marketplace.
# **Introduction to Roo Code**
**What Can [Roo Code](https://github.com/RooCodeInc/Roo-Code) Do For YOU?**
* Generate Code from natural language descriptions and specs
* Adapt with Modes: Code, Architect, Ask, Debug, and Custom Modes
* Refactor & Debug existing code
* Write & Update documentation
* Answer Questions about your codebase
* Automate repetitive tasks
* Utilize MCP Servers
# Step
**Install** the [Roo Code extension](https://marketplace.visualstudio.com/items?itemName=RooVeterinaryInc.roo-cline) from the [**VS Code**](https://code.visualstudio.com/download) Marketplace.
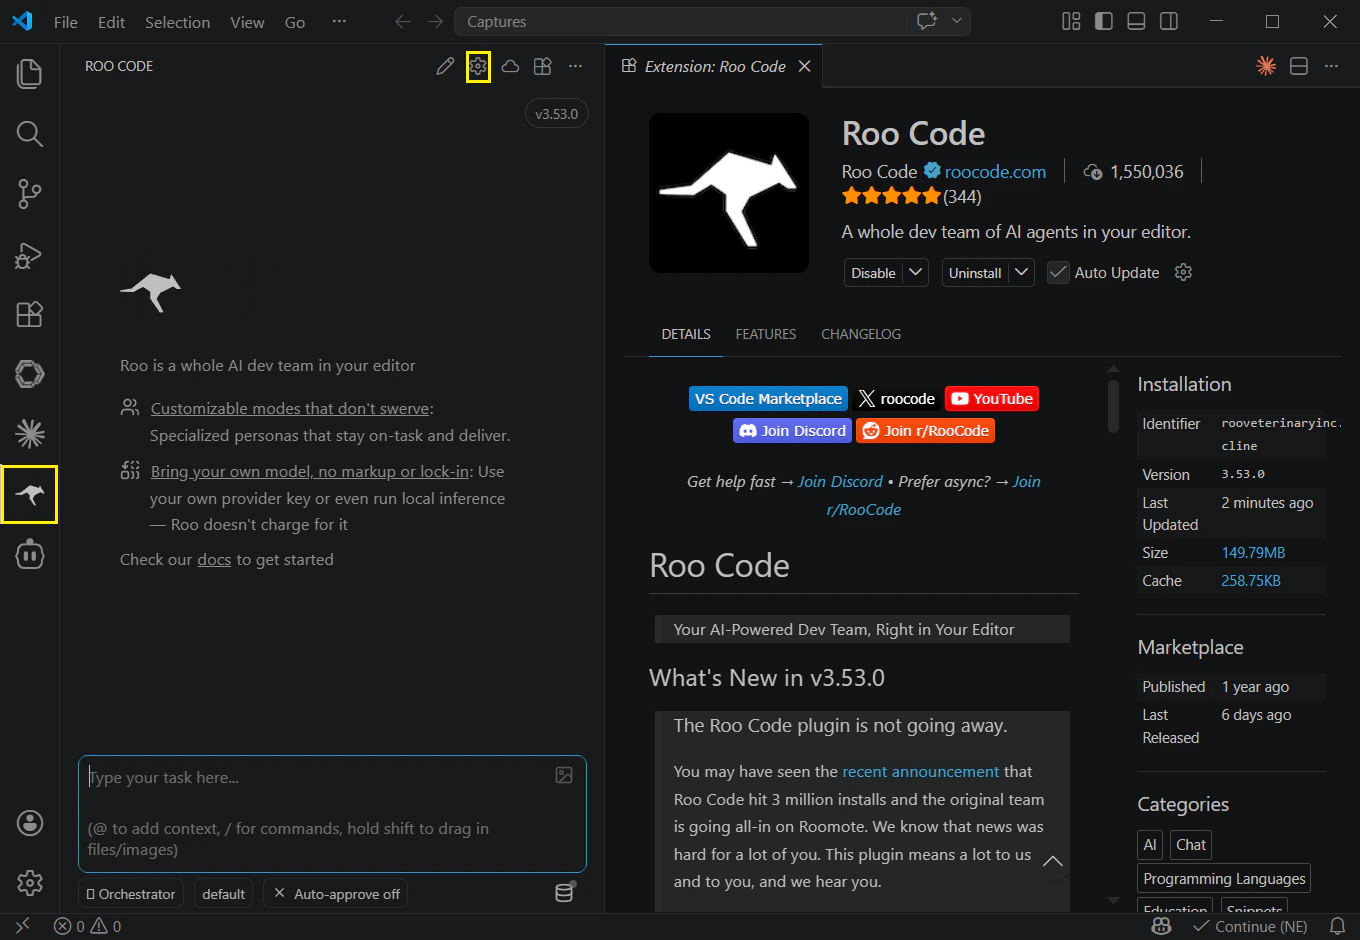
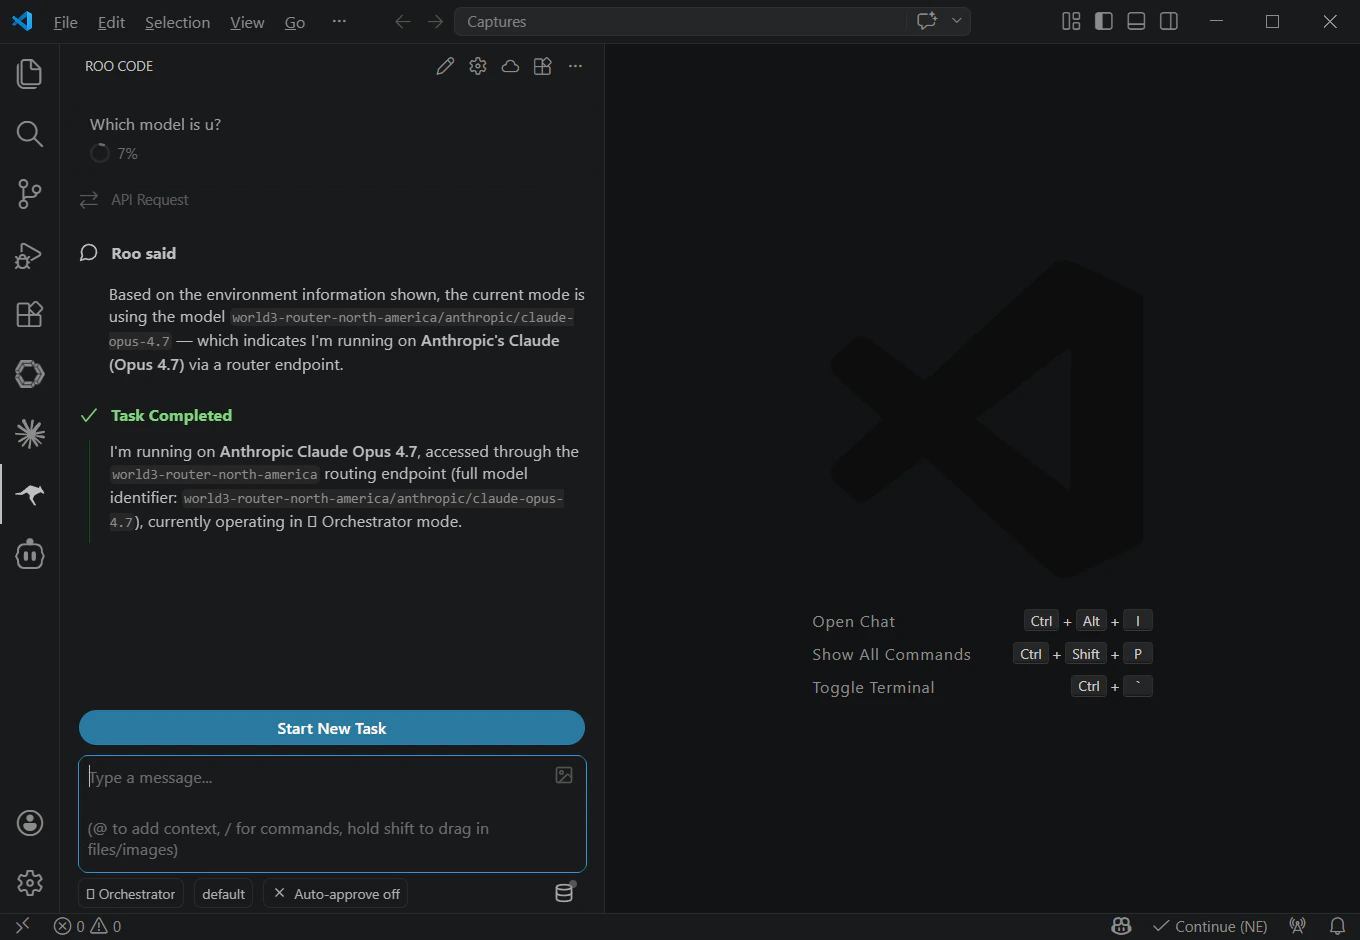
 Click the “Roo Code” icon on the sidebar to launch. And click the settings in the top-right corner. If Roo Code prompts you to create an account, please select “Use without an account” and choose a third-party provider.
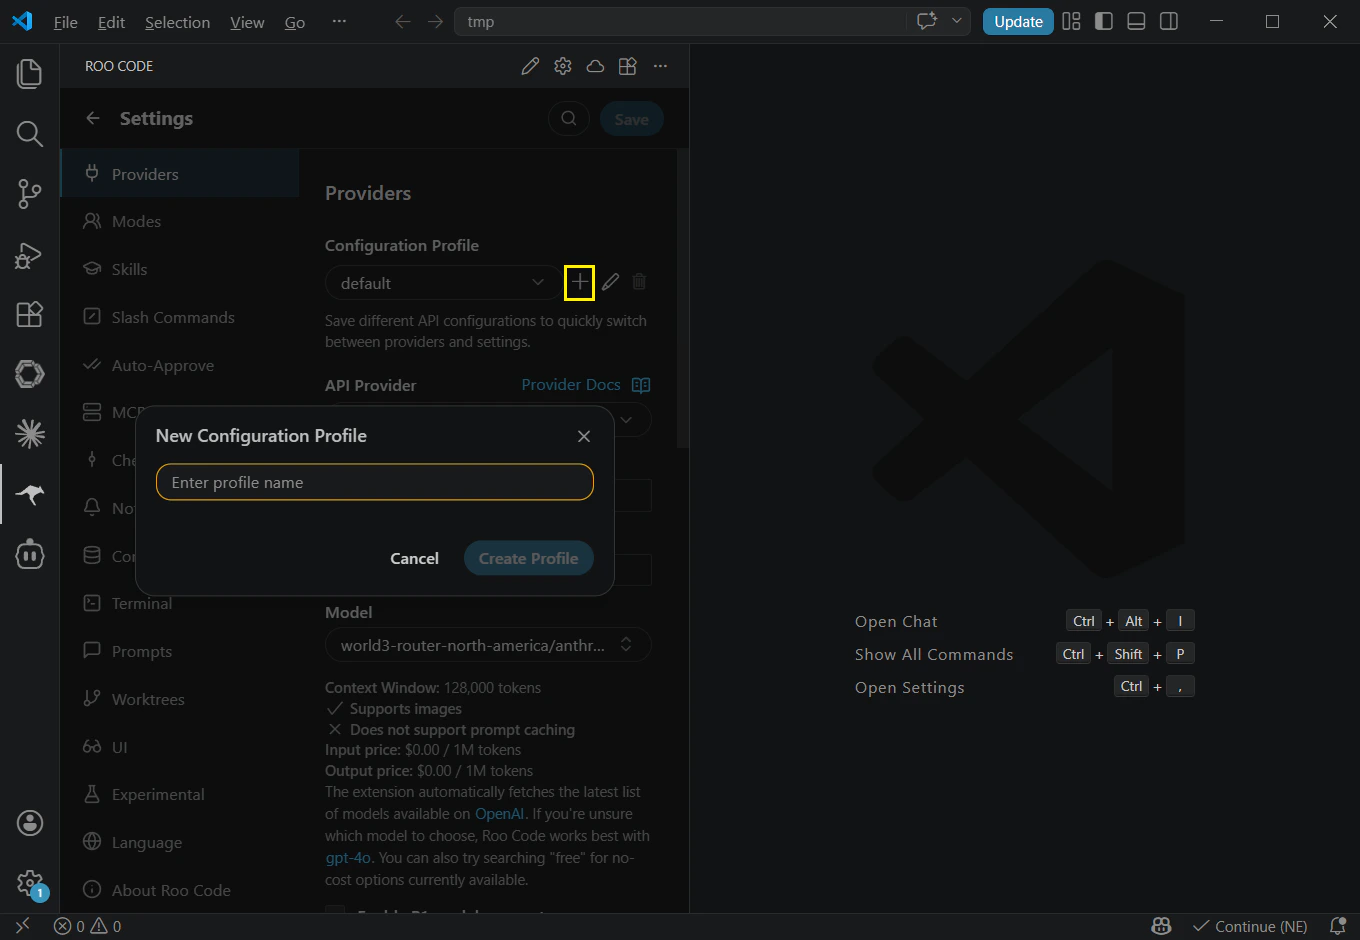
 Enter the following configuration information in these fields.
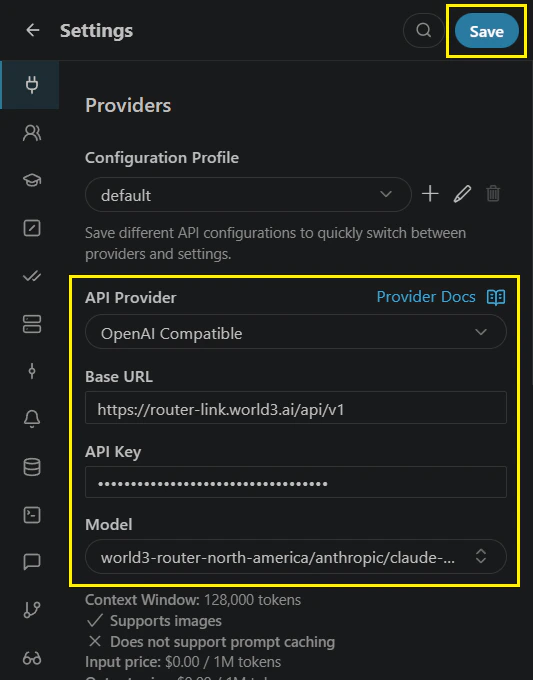 Example using claude-opus-4.7 with the API format set to OpenAI. Then click “Save”.
| **Field** | **Content** |
| :----------- | :------------------------------------------------------------------------------- |
| API Provider | Select “OpenAI Compatible” |
| Base URL | [**https://router-link.world3.ai/api/v1**](https://router-link.world3.ai/api/v1) |
| API Key | Obtain one from [**RouterLInk**](https://routerlink.ai/settings/api-keys) |
| Model | claude-opus-4-7 |
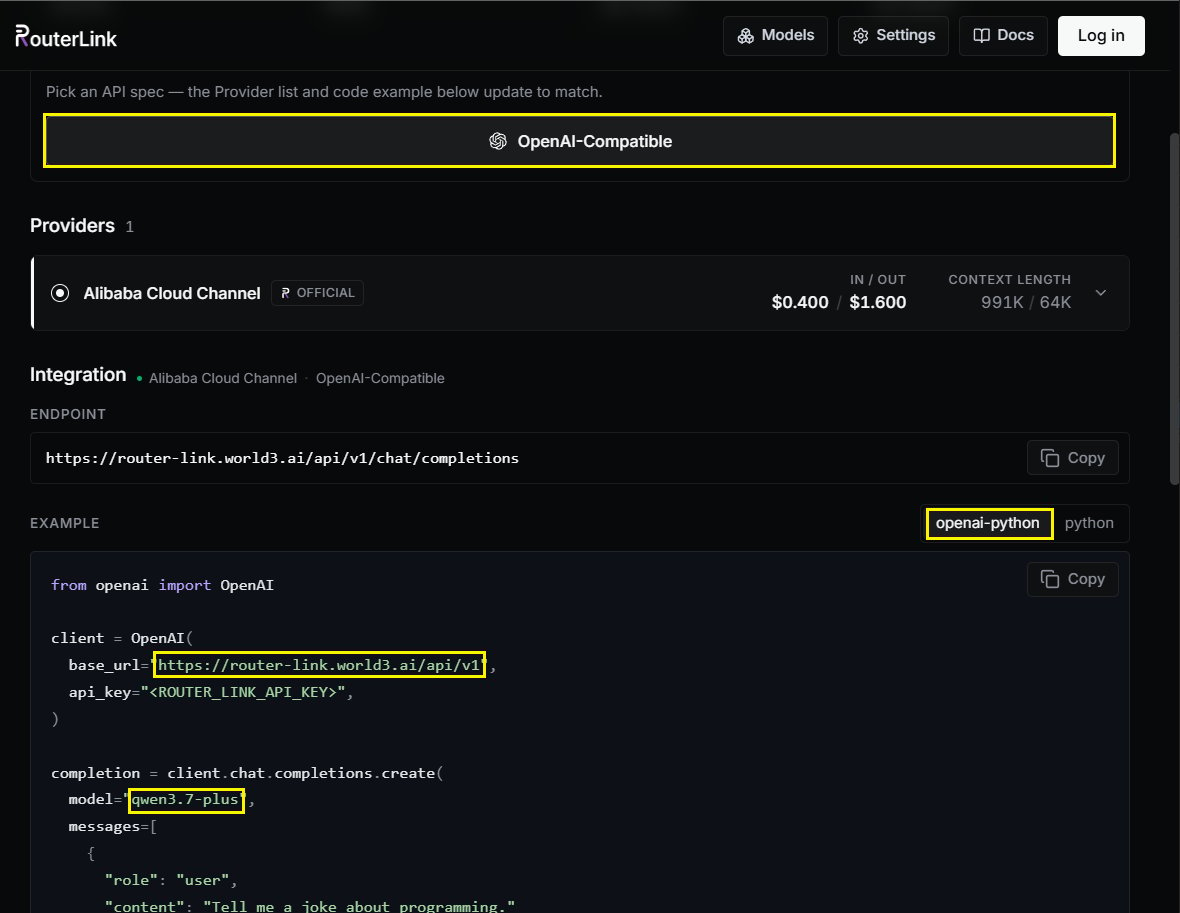
You can change the [model](https://routerlink.ai/models) manually with the Model ID (OpenAI-compatible API format is required):
Example using claude-opus-4.7 with the API format set to OpenAI. Then click “Save”.
| **Field** | **Content** |
| :----------- | :------------------------------------------------------------------------------- |
| API Provider | Select “OpenAI Compatible” |
| Base URL | [**https://router-link.world3.ai/api/v1**](https://router-link.world3.ai/api/v1) |
| API Key | Obtain one from [**RouterLInk**](https://routerlink.ai/settings/api-keys) |
| Model | claude-opus-4-7 |
You can change the [model](https://routerlink.ai/models) manually with the Model ID (OpenAI-compatible API format is required):
 Type a clear, concise description of what you want Roo Code to do in the chat box at the bottom of the panel. Examples of effective tasks:
* "Create a file named `hello.txt` containing 'Hello, world!'."
* "Write a Python function that adds two numbers."
* "Create an HTML file for a simple website with the title 'Roo test'"
No special commands or syntax needed—just use plain.
Type a clear, concise description of what you want Roo Code to do in the chat box at the bottom of the panel. Examples of effective tasks:
* "Create a file named `hello.txt` containing 'Hello, world!'."
* "Write a Python function that adds two numbers."
* "Create an HTML file for a simple website with the title 'Roo test'"
No special commands or syntax needed—just use plain.
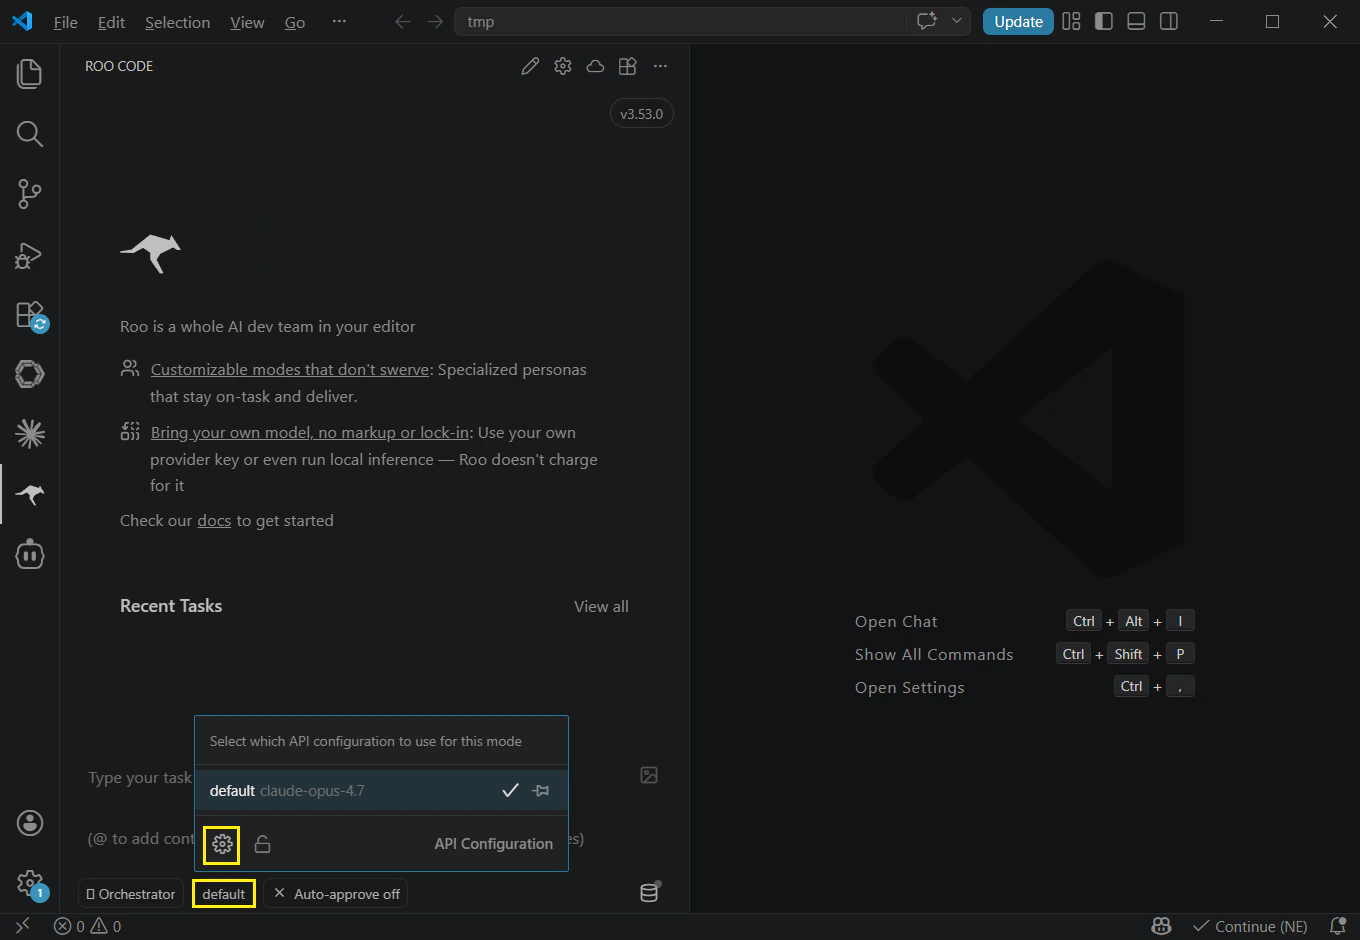
 You can click the “Default” button below to add more models.
 ## **Troubleshooting**
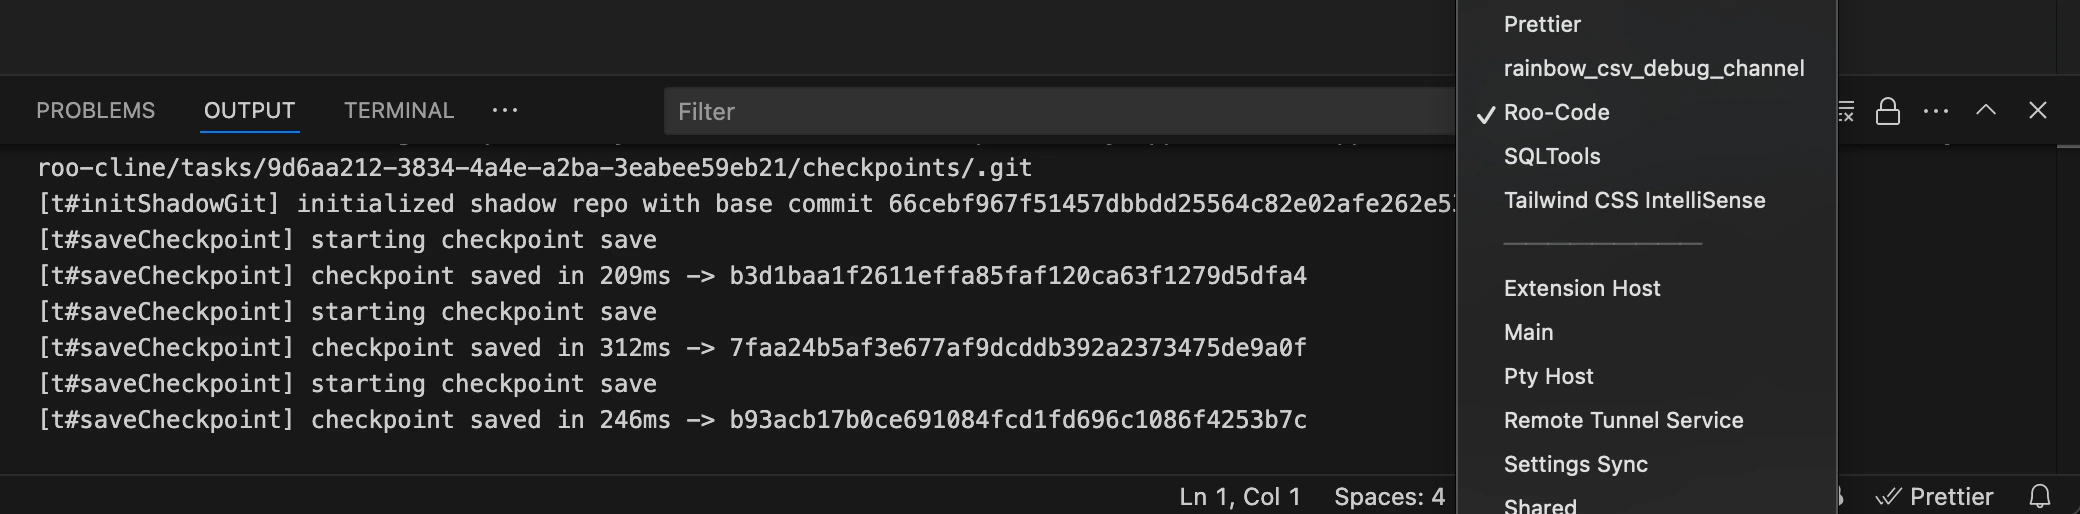 *VS Code Output panel showing Roo Code logs for troubleshooting*
**Extension Not Visible**
* Restart VS Code
* Verify Roo Code is listed and enabled in Extensions
* Try disabling and re-enabling
* Check Output panel for errors (View → Output, select "Roo Code")
**Installation Problems**
* Ensure stable internet connection
* Verify VS Code version 1.84.0 or later
* If VS Code Marketplace is inaccessible, try the Open VSX Registry method
*VS Code Output panel showing Roo Code logs for troubleshooting*
**Extension Not Visible**
* Restart VS Code
* Verify Roo Code is listed and enabled in Extensions
* Try disabling and re-enabling
* Check Output panel for errors (View → Output, select "Roo Code")
**Installation Problems**
* Ensure stable internet connection
* Verify VS Code version 1.84.0 or later
* If VS Code Marketplace is inaccessible, try the Open VSX Registry method