> ## Documentation Index
> Fetch the complete documentation index at: https://docs.routerlink.ai/llms.txt
> Use this file to discover all available pages before exploring further.
# Claude Code
> Use Claude Code with RouterLink — bill against credits, no Anthropic subscription required.
> This documentation is provided for informational purposes only and demonstrates how to configure and use our API with third-party AI chat interfaces. Any third-party software, websites, or services mentioned are not operated, controlled, or endorsed by us.
# **Introduction to Claude Code**
 [**Claude Code**](https://github.com/anthropics/claude-code) is an agentic coding tool that lives in your terminal, understands your codebase, and helps you code faster by executing routine tasks, explaining complex code, and handling git workflows - all through natural language commands.
**Claude Code** Key Features:
* **Autonomous Action**: Reads/writes files, runs terminal commands, and fixes bugs directly.
* **Full Context**: Automatically understands the entire codebase without manual copy-pasting.
* **Safety & Control**: Supports one-click rollbacks and requires manual approval for key actions.
* **Tool Integration**: Supports custom complex workflows via SKILL.md.
## **Step**
> If you have previously installed Claude Code, please run the following command in the terminal to update to the latest version. This may require administrator privileges.
```shellscript theme={null}
claude update
```
Need a one-click configuration tool? Try [RouterLink Starter](https://routerlink.ai/?utm_source=chatgpt.com), officially released by RouterLink.
RouterLink has already prepared installation scripts for you. You can run the following commands for one-click installation of Node.js and the corresponding coding agent.
**macOS, Linux, WSL:**
```shellscript theme={null}
curl -fsSL https://install.routerlink.ai/claude.sh | bash
```
**Windows PowerShell:**
```shellscript theme={null}
irm https://install.routerlink.ai/claude.ps1 | iex
```
> Windows users may be unable to run scripts because of digital signature requirements. Please run the following command:\
> **Windows PowerShell:**
>
> ```powershell theme={null}
> Set-ExecutionPolicy -Scope CurrentUser -ExecutionPolicy RemoteSigned -Force
> ```
**Or**, you can choose to **manually** install Node.js and the corresponding coding agent:
Install [the newest LTS version of Node.js](https://nodejs.org/en/download/), and then use npm to install it globally in the terminal:
```shellscript theme={null}
npm install -g @anthropic-ai/claude-code
```
**macOS, Linux, WSL:**
```shellscript theme={null}
curl -fsSL https://claude.ai/install.sh | bash
```
**Windows PowerShell:**
```powershell theme={null}
irm https://claude.ai/install.ps1 | iex
```
**Windows CMD:**
```powershell theme={null}
curl -fsSL https://claude.ai/install.cmd -o install.cmd && install.cmd && del install.cmd
```
If you see `The token '&&' is not a valid statement separator`, you’re in PowerShell, not CMD. If you see `'irm' is not recognized as an internal or external command`, you’re in CMD, not PowerShell. Your prompt shows `PS C:\` when you’re in PowerShell and `C:\` without the `PS` when you’re in CMD.
**Native Windows setups require [Git for Windows](https://git-scm.com/downloads/win).** Install it first if you don’t have it. WSL setups do not need it.
Native installations automatically update in the background to keep you on the latest version.
**Install** the [**Claude Code** extension](https://marketplace.visualstudio.com/items?itemName=anthropic.claude-code) from the [VS Code](https://code.visualstudio.com/download) Marketplace — no separate CLI needed. The VS Code extension provides inline diffs, @-mentions, plan review, and conversation history directly in your editor.
[**Claude Code**](https://github.com/anthropics/claude-code) is an agentic coding tool that lives in your terminal, understands your codebase, and helps you code faster by executing routine tasks, explaining complex code, and handling git workflows - all through natural language commands.
**Claude Code** Key Features:
* **Autonomous Action**: Reads/writes files, runs terminal commands, and fixes bugs directly.
* **Full Context**: Automatically understands the entire codebase without manual copy-pasting.
* **Safety & Control**: Supports one-click rollbacks and requires manual approval for key actions.
* **Tool Integration**: Supports custom complex workflows via SKILL.md.
## **Step**
> If you have previously installed Claude Code, please run the following command in the terminal to update to the latest version. This may require administrator privileges.
```shellscript theme={null}
claude update
```
Need a one-click configuration tool? Try [RouterLink Starter](https://routerlink.ai/?utm_source=chatgpt.com), officially released by RouterLink.
RouterLink has already prepared installation scripts for you. You can run the following commands for one-click installation of Node.js and the corresponding coding agent.
**macOS, Linux, WSL:**
```shellscript theme={null}
curl -fsSL https://install.routerlink.ai/claude.sh | bash
```
**Windows PowerShell:**
```shellscript theme={null}
irm https://install.routerlink.ai/claude.ps1 | iex
```
> Windows users may be unable to run scripts because of digital signature requirements. Please run the following command:\
> **Windows PowerShell:**
>
> ```powershell theme={null}
> Set-ExecutionPolicy -Scope CurrentUser -ExecutionPolicy RemoteSigned -Force
> ```
**Or**, you can choose to **manually** install Node.js and the corresponding coding agent:
Install [the newest LTS version of Node.js](https://nodejs.org/en/download/), and then use npm to install it globally in the terminal:
```shellscript theme={null}
npm install -g @anthropic-ai/claude-code
```
**macOS, Linux, WSL:**
```shellscript theme={null}
curl -fsSL https://claude.ai/install.sh | bash
```
**Windows PowerShell:**
```powershell theme={null}
irm https://claude.ai/install.ps1 | iex
```
**Windows CMD:**
```powershell theme={null}
curl -fsSL https://claude.ai/install.cmd -o install.cmd && install.cmd && del install.cmd
```
If you see `The token '&&' is not a valid statement separator`, you’re in PowerShell, not CMD. If you see `'irm' is not recognized as an internal or external command`, you’re in CMD, not PowerShell. Your prompt shows `PS C:\` when you’re in PowerShell and `C:\` without the `PS` when you’re in CMD.
**Native Windows setups require [Git for Windows](https://git-scm.com/downloads/win).** Install it first if you don’t have it. WSL setups do not need it.
Native installations automatically update in the background to keep you on the latest version.
**Install** the [**Claude Code** extension](https://marketplace.visualstudio.com/items?itemName=anthropic.claude-code) from the [VS Code](https://code.visualstudio.com/download) Marketplace — no separate CLI needed. The VS Code extension provides inline diffs, @-mentions, plan review, and conversation history directly in your editor.
 The Claude Desktop App is available on macOS and Windows.
Please follow [the tutorial](https://code.claude.com/docs/en/desktop-quickstart) to complete the installation.
Claude Code officially supports managing persistent configuration through the settings system. For daily use, it is recommended to prioritize writing configurations into `settings.json`. Shell or system environment variables are better suited for temporary switching, CI scenarios, or as a fallback when encountering known issues in the current version.
**Edit or create** the settings.json file\
On macOS & Linux: `~/.claude/settings.json`\
On Windows: `C:\Users\\.claude\settings.json`
Make sure to replace `` with your API key from [RouterLink](https://routerlink.ai/settings/api-keys). When replacing it, do not keep the angle brackets `<` and `>`.
```json theme={null}
{
"env": {
"ANTHROPIC_AUTH_TOKEN": "",
"ANTHROPIC_BASE_URL": "https://router-link.world3.ai/api",
"API_TIMEOUT_MS": "3000000",
"CLAUDE_CODE_DISABLE_NONESSENTIAL_TRAFFIC": "1",
"ANTHROPIC_DEFAULT_HAIKU_MODEL": "claude-haiku-4-5",
"ANTHROPIC_DEFAULT_SONNET_MODEL": "claude-sonnet-4-6",
"ANTHROPIC_DEFAULT_OPUS_MODEL": "claude-opus-4-8",
"ANTHROPIC_DEFAULT_FABLE_MODEL": "claude-fable-5"
}
}
```
Open your VS Code `settings.json.`
The Claude Desktop App is available on macOS and Windows.
Please follow [the tutorial](https://code.claude.com/docs/en/desktop-quickstart) to complete the installation.
Claude Code officially supports managing persistent configuration through the settings system. For daily use, it is recommended to prioritize writing configurations into `settings.json`. Shell or system environment variables are better suited for temporary switching, CI scenarios, or as a fallback when encountering known issues in the current version.
**Edit or create** the settings.json file\
On macOS & Linux: `~/.claude/settings.json`\
On Windows: `C:\Users\\.claude\settings.json`
Make sure to replace `` with your API key from [RouterLink](https://routerlink.ai/settings/api-keys). When replacing it, do not keep the angle brackets `<` and `>`.
```json theme={null}
{
"env": {
"ANTHROPIC_AUTH_TOKEN": "",
"ANTHROPIC_BASE_URL": "https://router-link.world3.ai/api",
"API_TIMEOUT_MS": "3000000",
"CLAUDE_CODE_DISABLE_NONESSENTIAL_TRAFFIC": "1",
"ANTHROPIC_DEFAULT_HAIKU_MODEL": "claude-haiku-4-5",
"ANTHROPIC_DEFAULT_SONNET_MODEL": "claude-sonnet-4-6",
"ANTHROPIC_DEFAULT_OPUS_MODEL": "claude-opus-4-8",
"ANTHROPIC_DEFAULT_FABLE_MODEL": "claude-fable-5"
}
}
```
Open your VS Code `settings.json.`
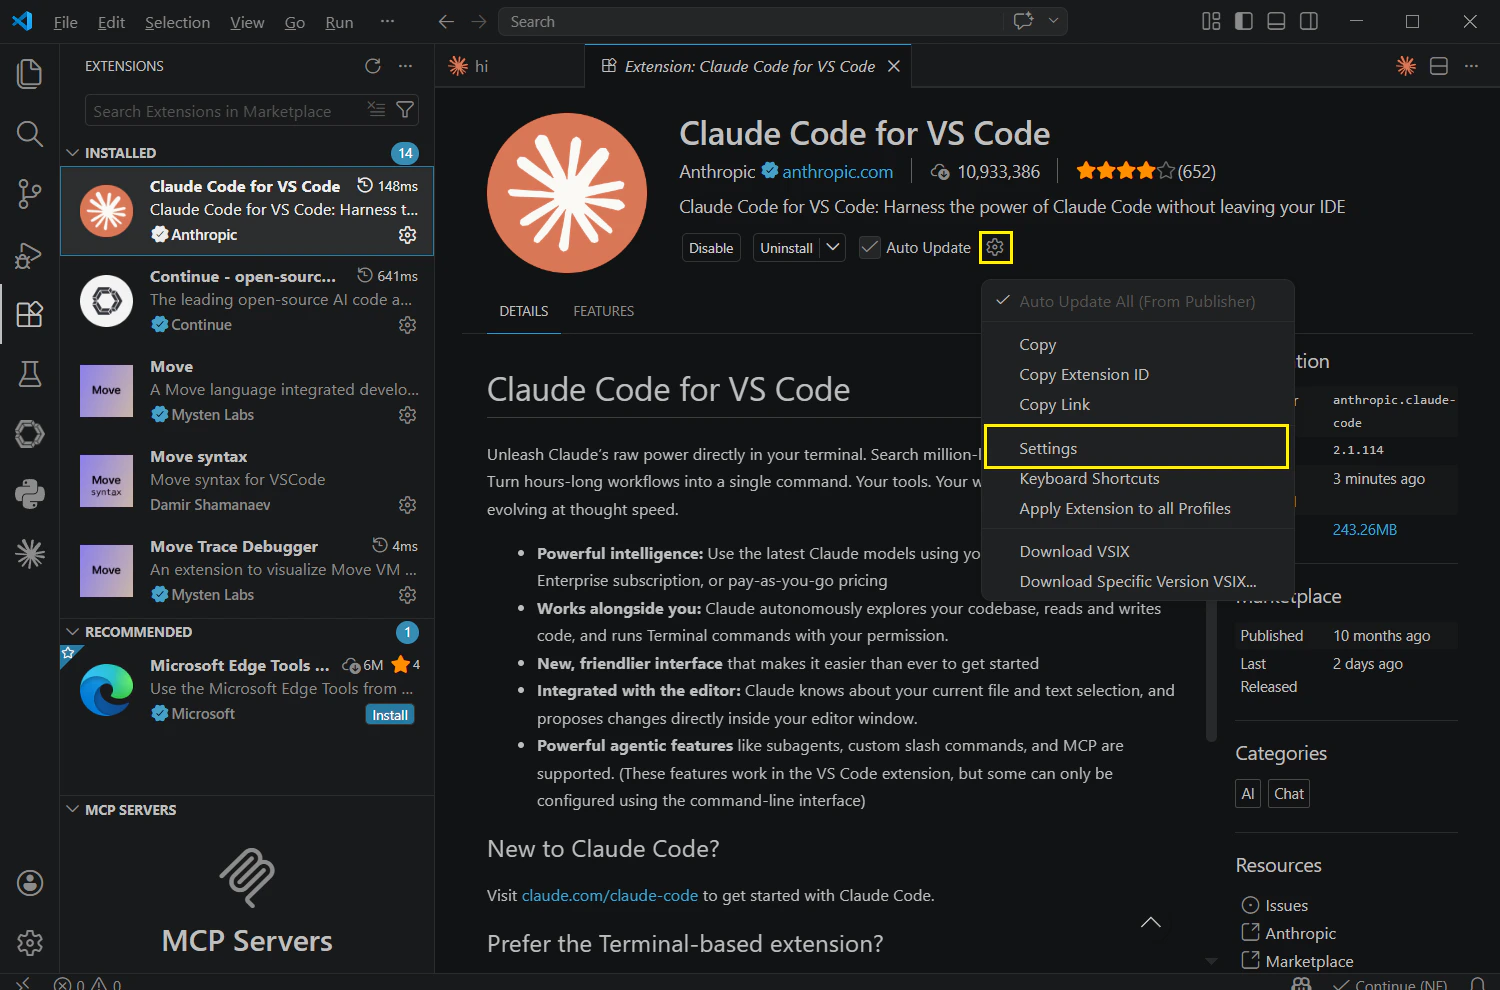 Click **“Edit in settings.json”** under **Environment Variables**.
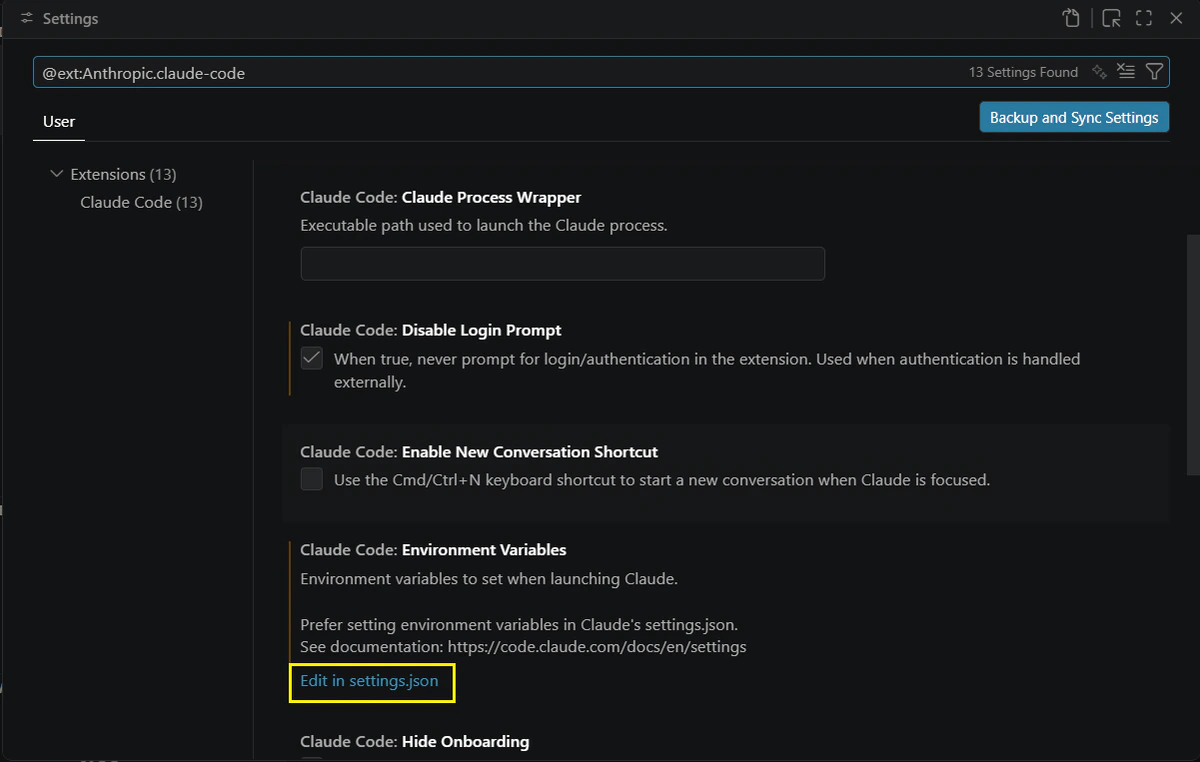 Add the following content. Make sure to replace with the `` obtained from [RouterLink Key](https://routerlink.ai/settings/api-keys).
```json theme={null}
{
"claudeCode.disableLoginPrompt": true,
"claudeCode.preferredLocation": "panel",
"claudeCode.environmentVariables": [
{"name":"ANTHROPIC_AUTH_TOKEN","value":""},
{"name":"ANTHROPIC_BASE_URL","value":"https://router-link.world3.ai/api"},
{"name":"ANTHROPIC_DEFAULT_HAIKU_MODEL","value":"claude-haiku-4-5"},
{"name":"ANTHROPIC_DEFAULT_SONNET_MODEL","value":"claude-sonnet-4-6"},
{"name":"ANTHROPIC_DEFAULT_OPUS_MODEL","value":"claude-opus-4-7"}
]
}
```
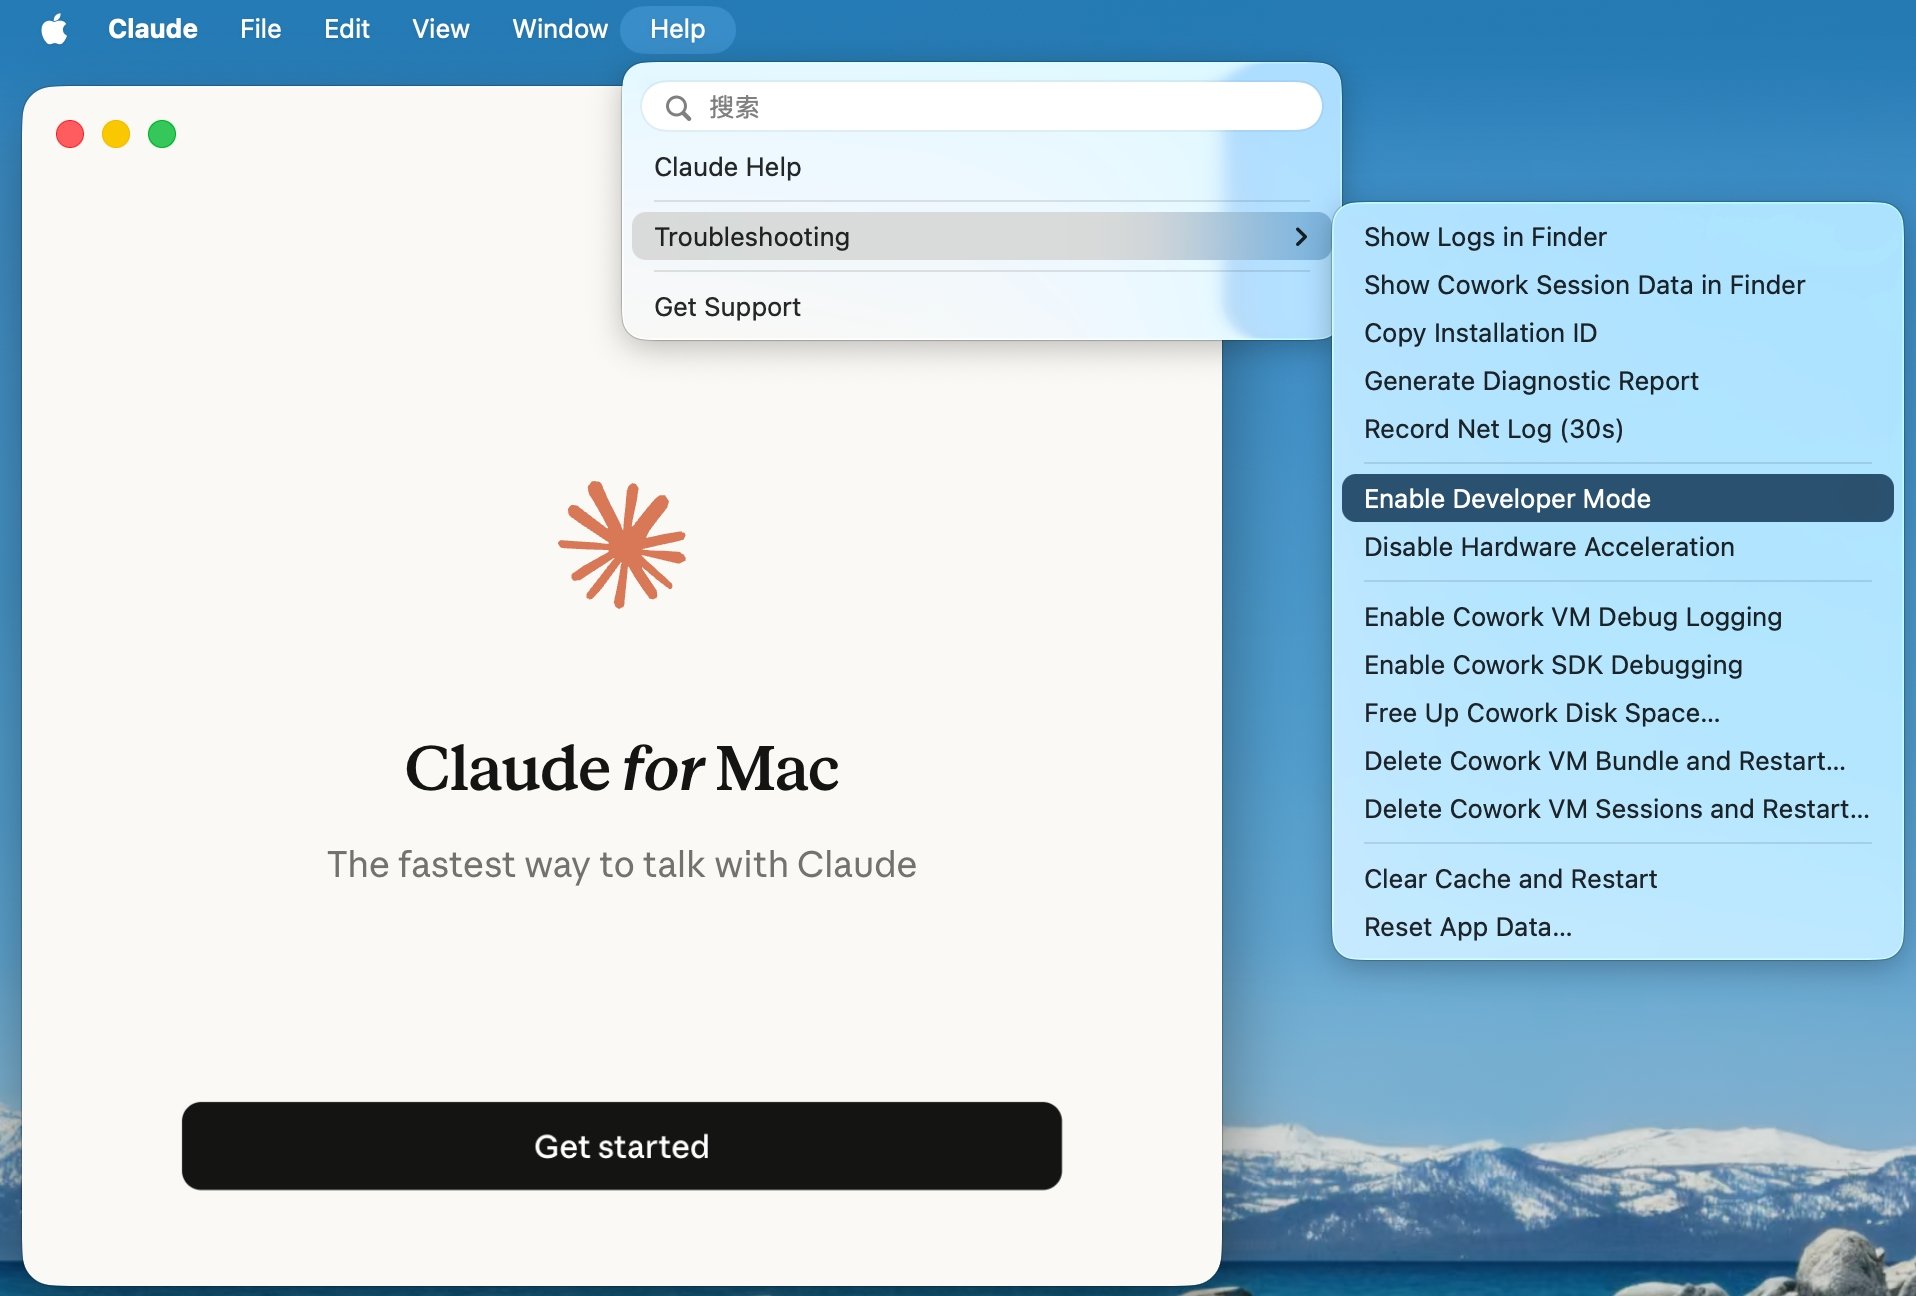
Open the installed Claude Desktop app.
* Click **Help** → **Troubleshooting** in the top menu bar.
* In the submenu that appears, click **Enable Developer Mode**.
* For Windows users, you can access the same options by clicking the menu button in the top-left corner of the Claude Desktop app.
Add the following content. Make sure to replace with the `` obtained from [RouterLink Key](https://routerlink.ai/settings/api-keys).
```json theme={null}
{
"claudeCode.disableLoginPrompt": true,
"claudeCode.preferredLocation": "panel",
"claudeCode.environmentVariables": [
{"name":"ANTHROPIC_AUTH_TOKEN","value":""},
{"name":"ANTHROPIC_BASE_URL","value":"https://router-link.world3.ai/api"},
{"name":"ANTHROPIC_DEFAULT_HAIKU_MODEL","value":"claude-haiku-4-5"},
{"name":"ANTHROPIC_DEFAULT_SONNET_MODEL","value":"claude-sonnet-4-6"},
{"name":"ANTHROPIC_DEFAULT_OPUS_MODEL","value":"claude-opus-4-7"}
]
}
```
Open the installed Claude Desktop app.
* Click **Help** → **Troubleshooting** in the top menu bar.
* In the submenu that appears, click **Enable Developer Mode**.
* For Windows users, you can access the same options by clicking the menu button in the top-left corner of the Claude Desktop app.
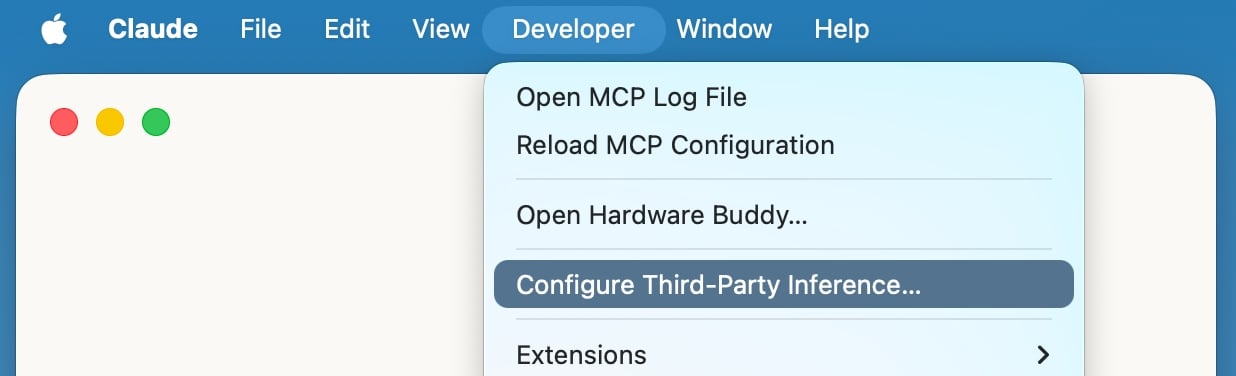
 * After Developer Mode is enabled successfully, a new **Developer** menu will appear in the top menu bar.
* From the **Developer** menu, select **Configure Third-Party Inference...**.
* After Developer Mode is enabled successfully, a new **Developer** menu will appear in the top menu bar.
* From the **Developer** menu, select **Configure Third-Party Inference...**.
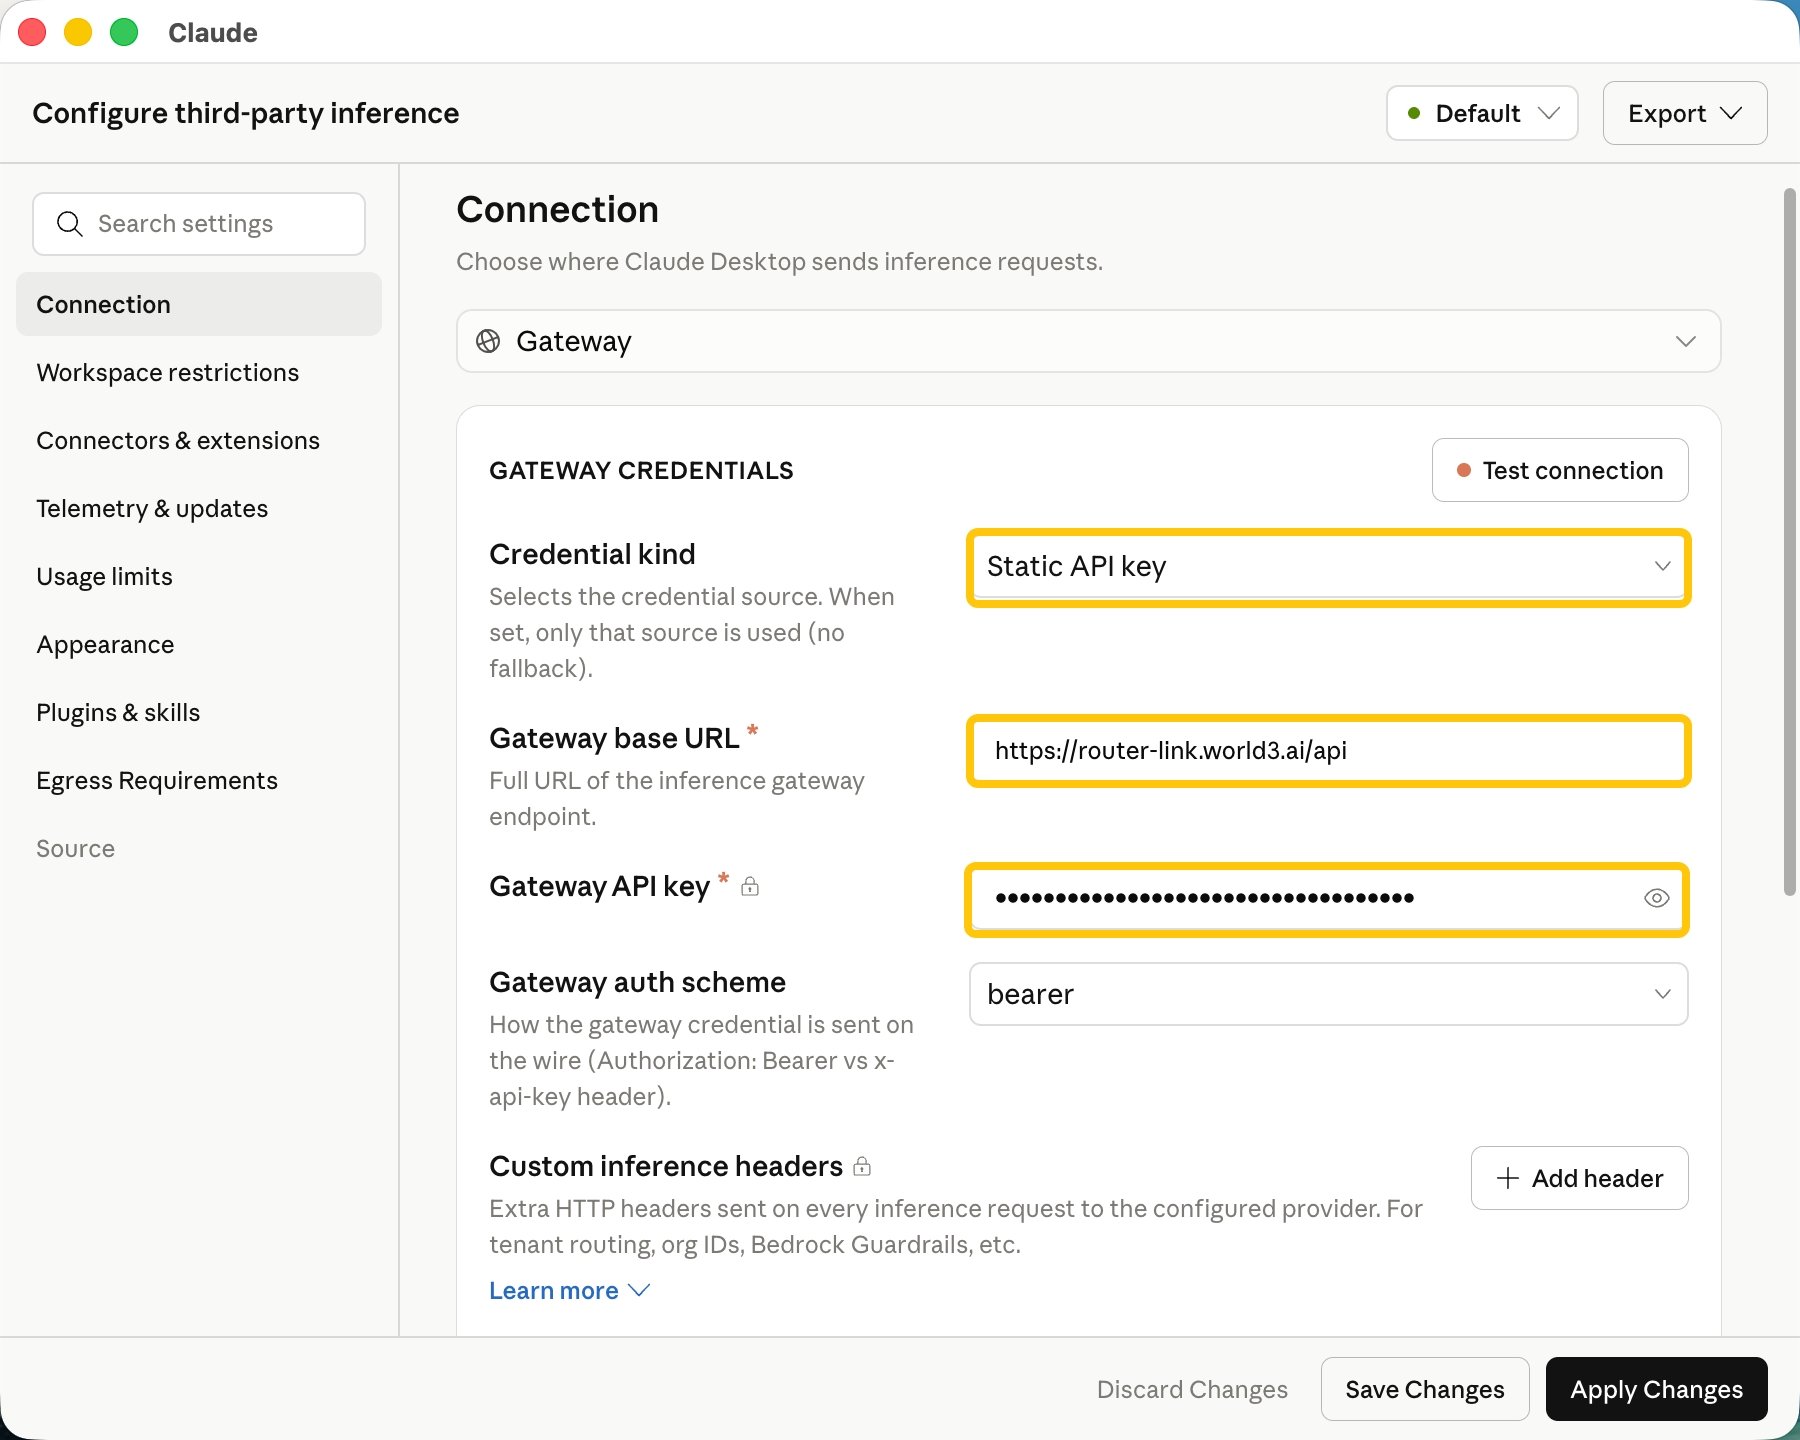
 * Select "**Static API key"** for **Credential kind**.
* Enter "**[https://router-link.world3.ai/api](https://router-link.world3.ai/api)"** as the **Gateway base URL**.
* For **Gateway API key**, enter the actual API key you obtained from [RouterLink Key](https://routerlink.ai/settings/api-keys).
* Select "**Static API key"** for **Credential kind**.
* Enter "**[https://router-link.world3.ai/api](https://router-link.world3.ai/api)"** as the **Gateway base URL**.
* For **Gateway API key**, enter the actual API key you obtained from [RouterLink Key](https://routerlink.ai/settings/api-keys).
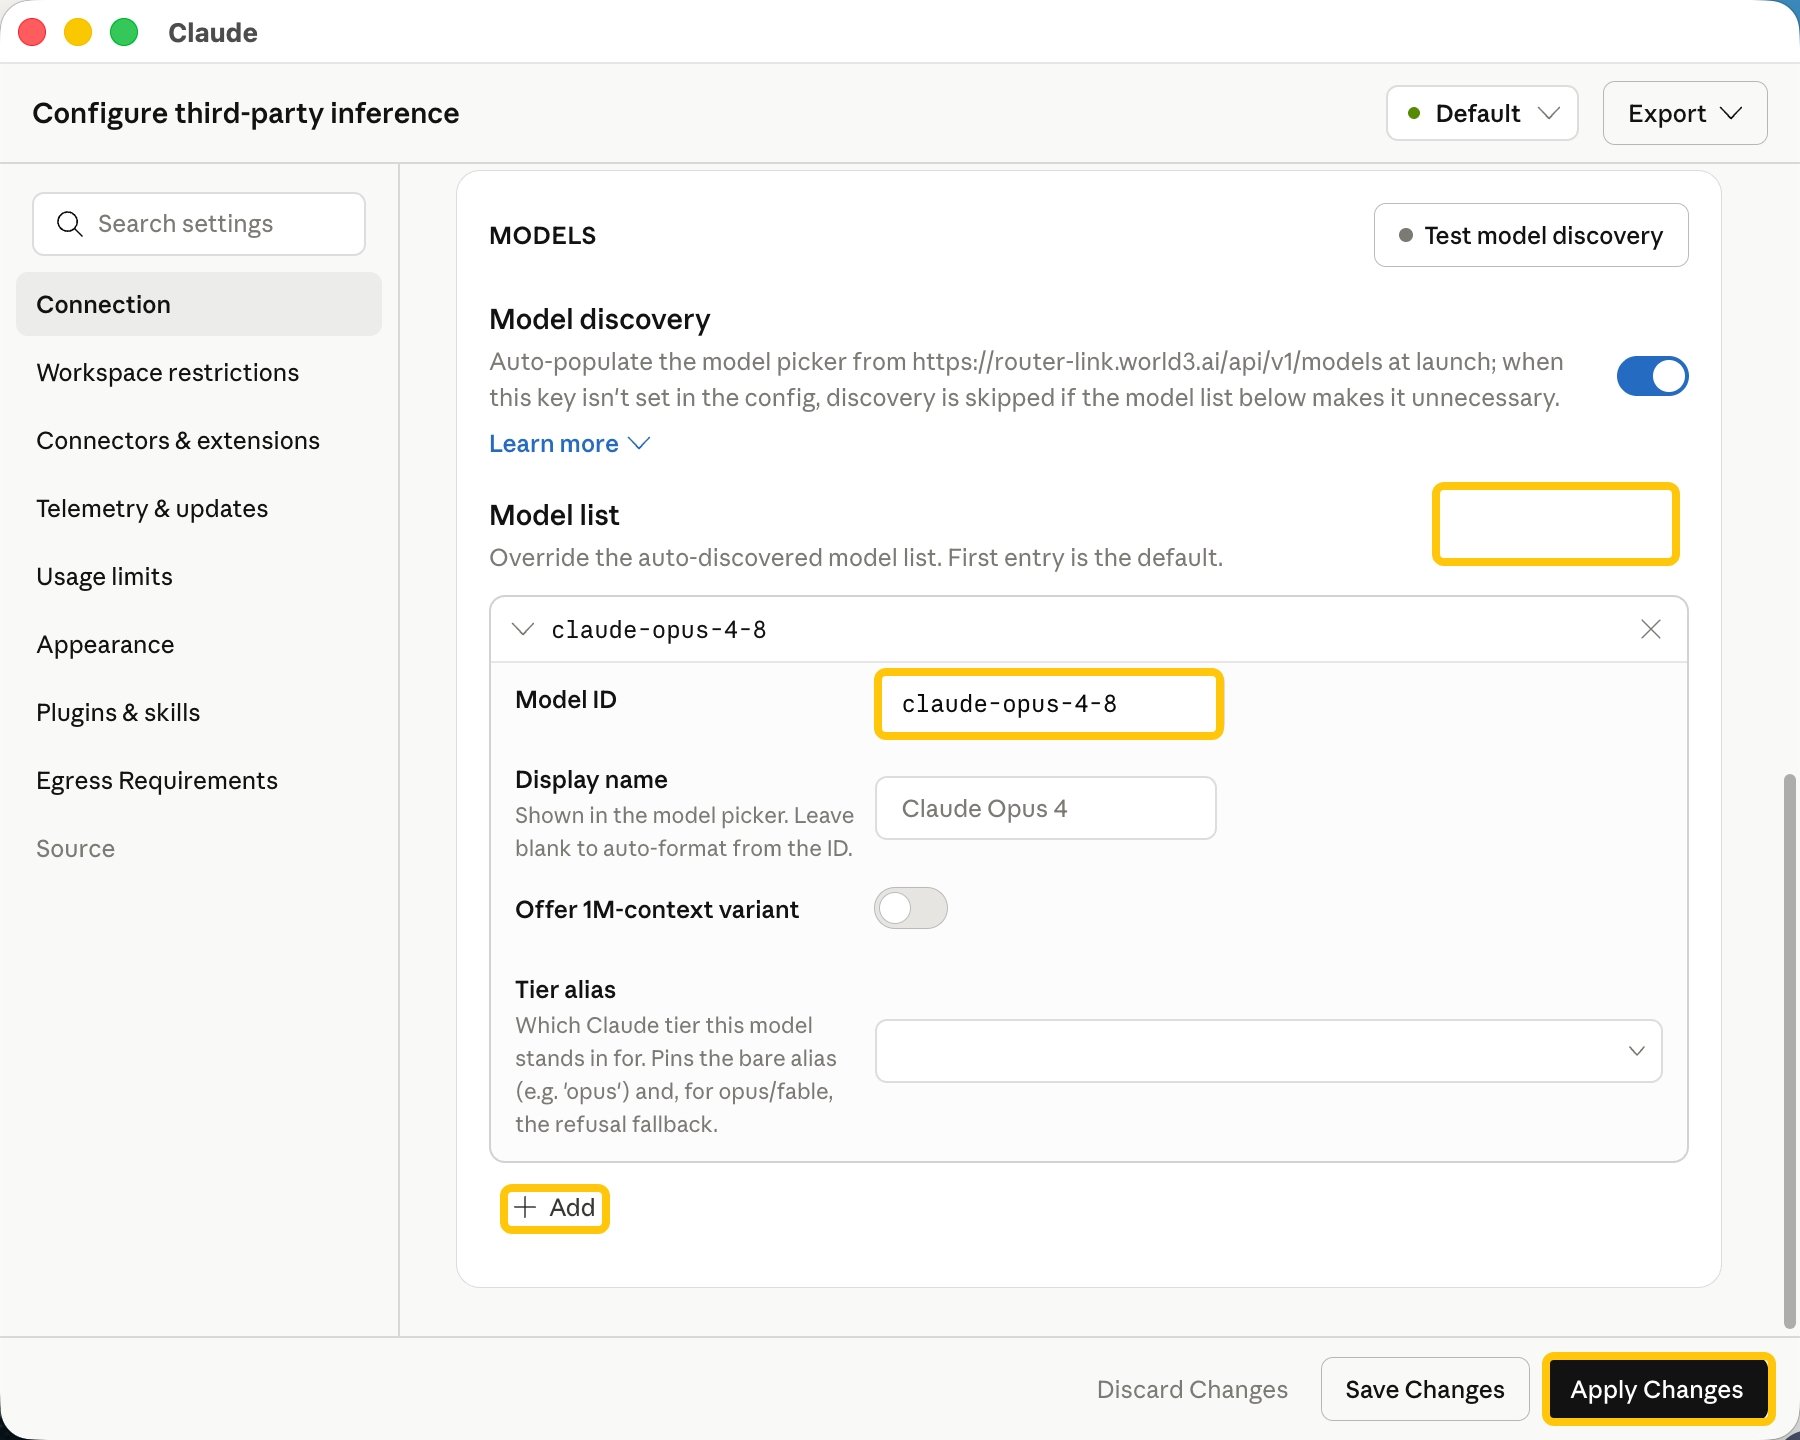
 * Scroll down the page and click "**Add model"**.
* In the **Model ID** field, enter "**claude-opus-4-8"**, then click **Add**. Repeat the same steps to add "**claude-sonnet-4-6"** and "**claude-haiku-4-5"**.
* **Offer 1M-context variant** can be enabled optionally.
* Finally, click **Apply Changes**.
* Scroll down the page and click "**Add model"**.
* In the **Model ID** field, enter "**claude-opus-4-8"**, then click **Add**. Repeat the same steps to add "**claude-sonnet-4-6"** and "**claude-haiku-4-5"**.
* **Offer 1M-context variant** can be enabled optionally.
* Finally, click **Apply Changes**.
 Navigate to your code working directory and run the `claude` command in the terminal to start using Claude Code.
```shellscript theme={null}
claude
```
When using Claude Code for the first time, you may be forced to log in to an Anthropic account.
Navigate to your code working directory and run the `claude` command in the terminal to start using Claude Code.
```shellscript theme={null}
claude
```
When using Claude Code for the first time, you may be forced to log in to an Anthropic account.
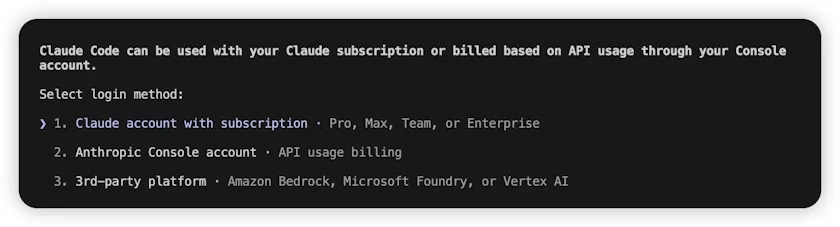 1. Please follow the steps below to skip this process:
2. Open or create the `.claude.json` file in the user’s home directory. The specific paths are as follows: macOS / Linux: `~/.claude.json` Windows: `C:\Users\\.claude.json`
3. Set the value of the `hasCompletedOnboarding` field to `true`.
```json theme={null}
{
"hasCompletedOnboarding": true
}
```
Save the file, then run `claude` again in the terminal.
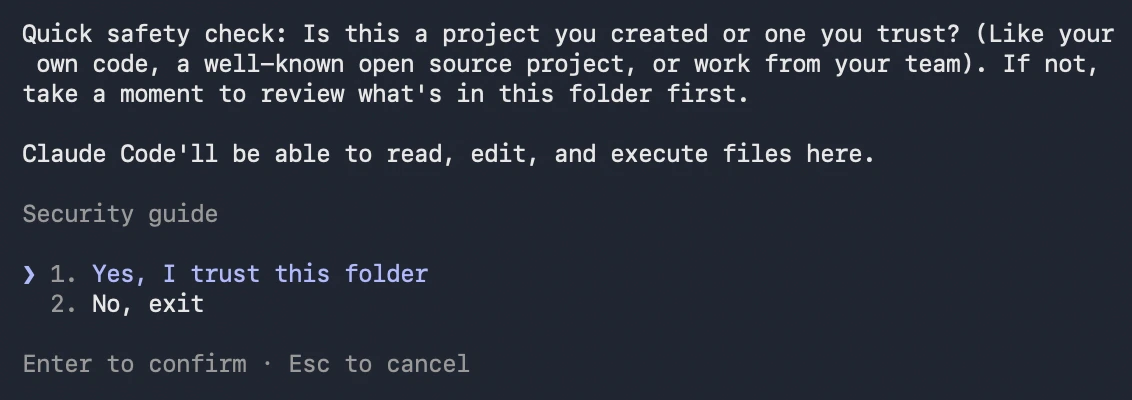
After launching, choose to trust Claude Code to access the files in the folder, as shown below:
1. Please follow the steps below to skip this process:
2. Open or create the `.claude.json` file in the user’s home directory. The specific paths are as follows: macOS / Linux: `~/.claude.json` Windows: `C:\Users\\.claude.json`
3. Set the value of the `hasCompletedOnboarding` field to `true`.
```json theme={null}
{
"hasCompletedOnboarding": true
}
```
Save the file, then run `claude` again in the terminal.
After launching, choose to trust Claude Code to access the files in the folder, as shown below:
 Done! You can now use Claude Code normally.
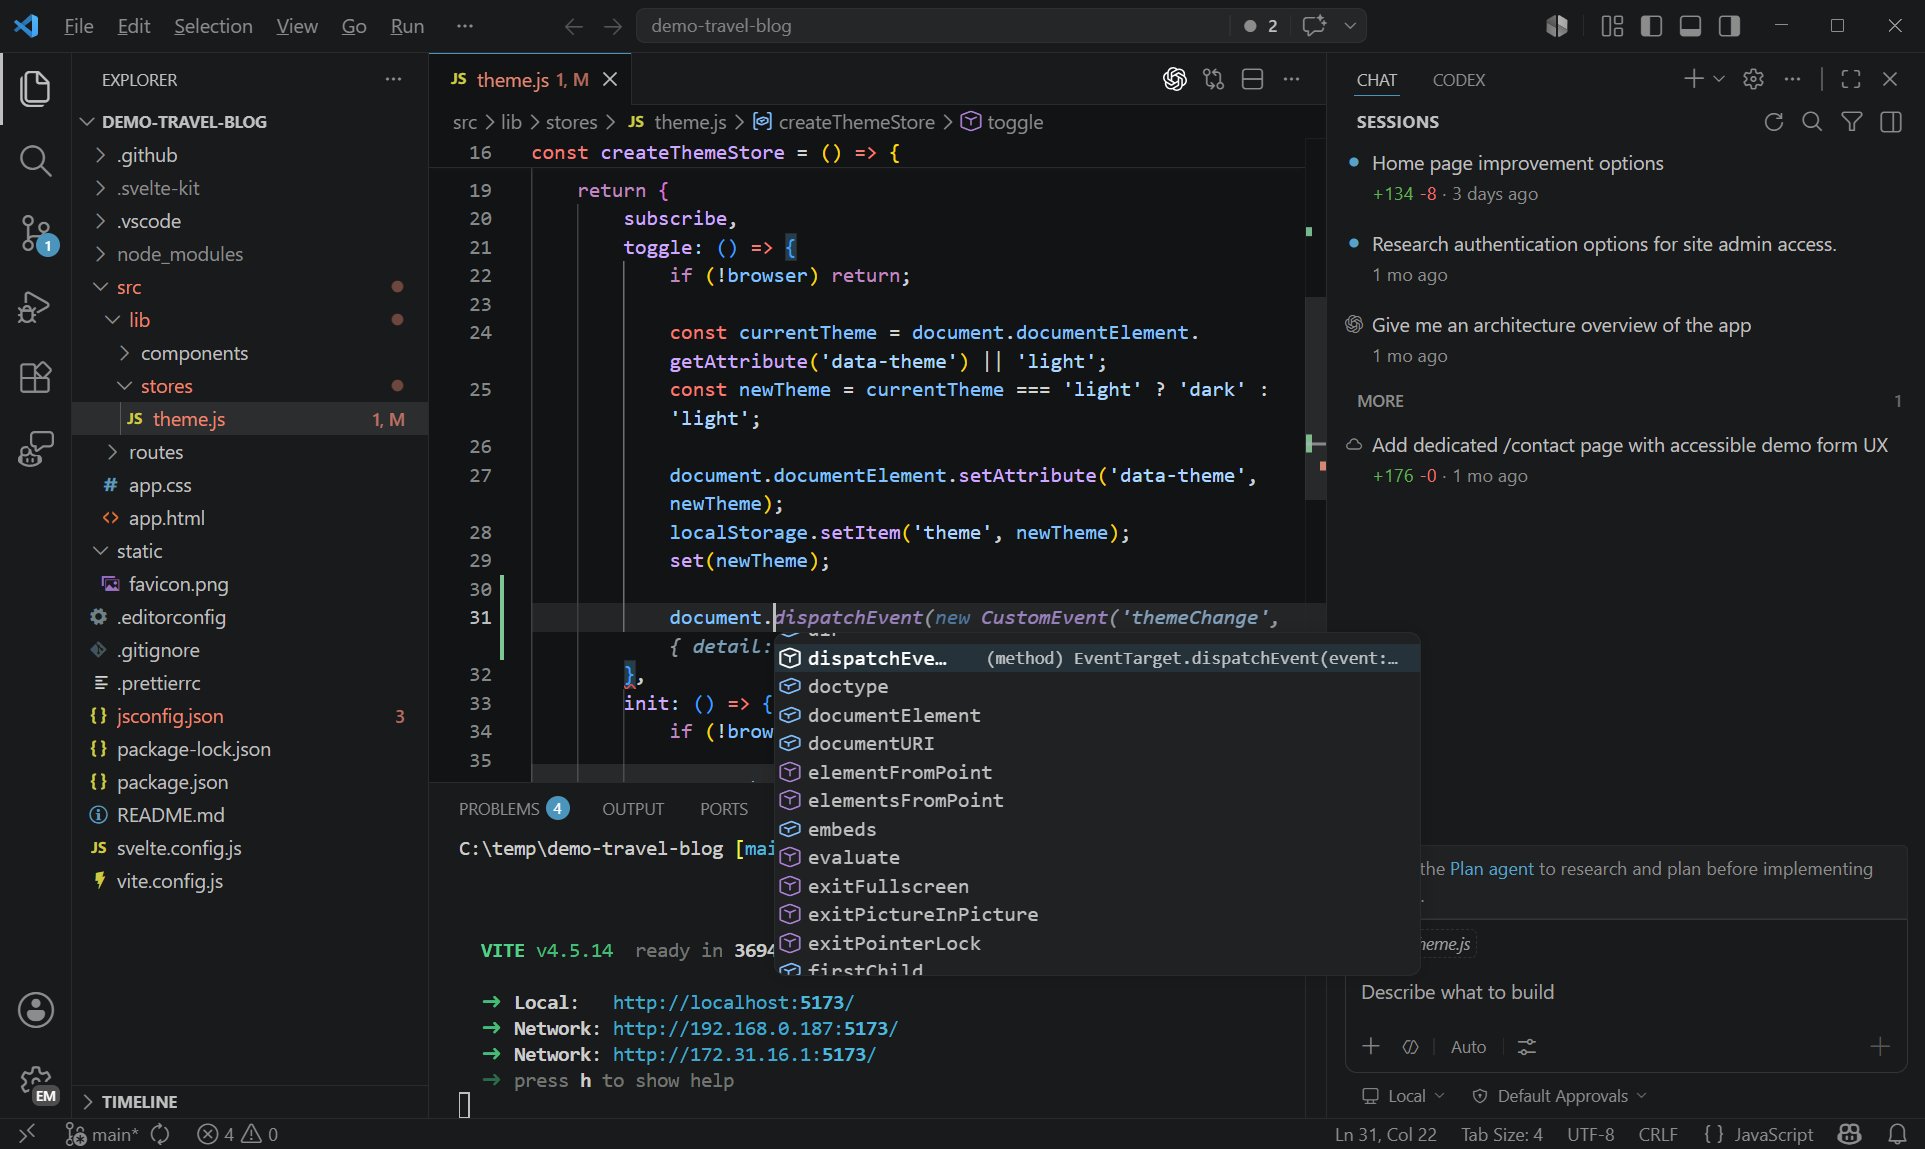
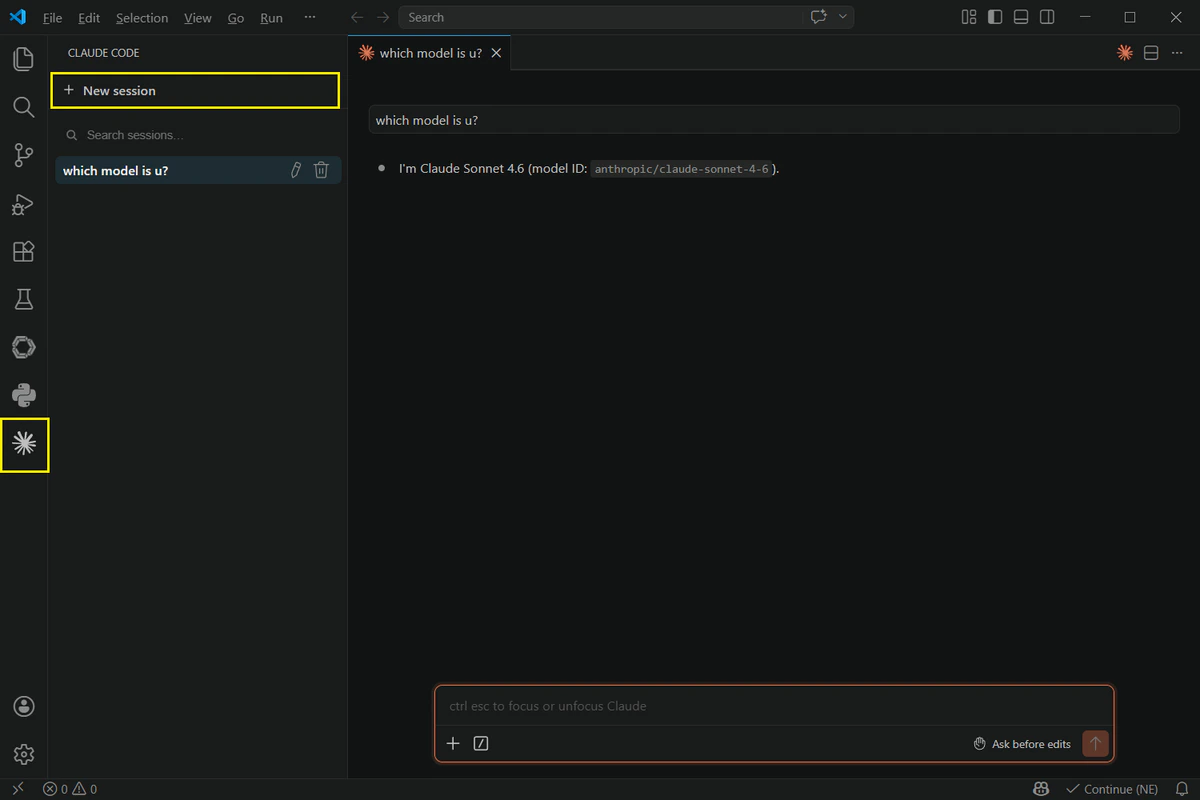
Click the Claude icon on the left, then select “New session” to start using Claude Code for VS Code.
Done! You can now use Claude Code normally.
Click the Claude icon on the left, then select “New session” to start using Claude Code for VS Code.
 Done! You can now use Claude Code for VS Code.
**Enable Virtualization on Windows**
Cowork runs in a virtualized environment. On Windows, you must enable the **Virtual Machine Platform** feature first; otherwise, Cowork will not work properly after installation.
Open **PowerShell** as an administrator and run the following command, then restart your computer:
```powershell theme={null}
Enable-WindowsOptionalFeature -Online -FeatureName VirtualMachinePlatform -All -NoRestart
```
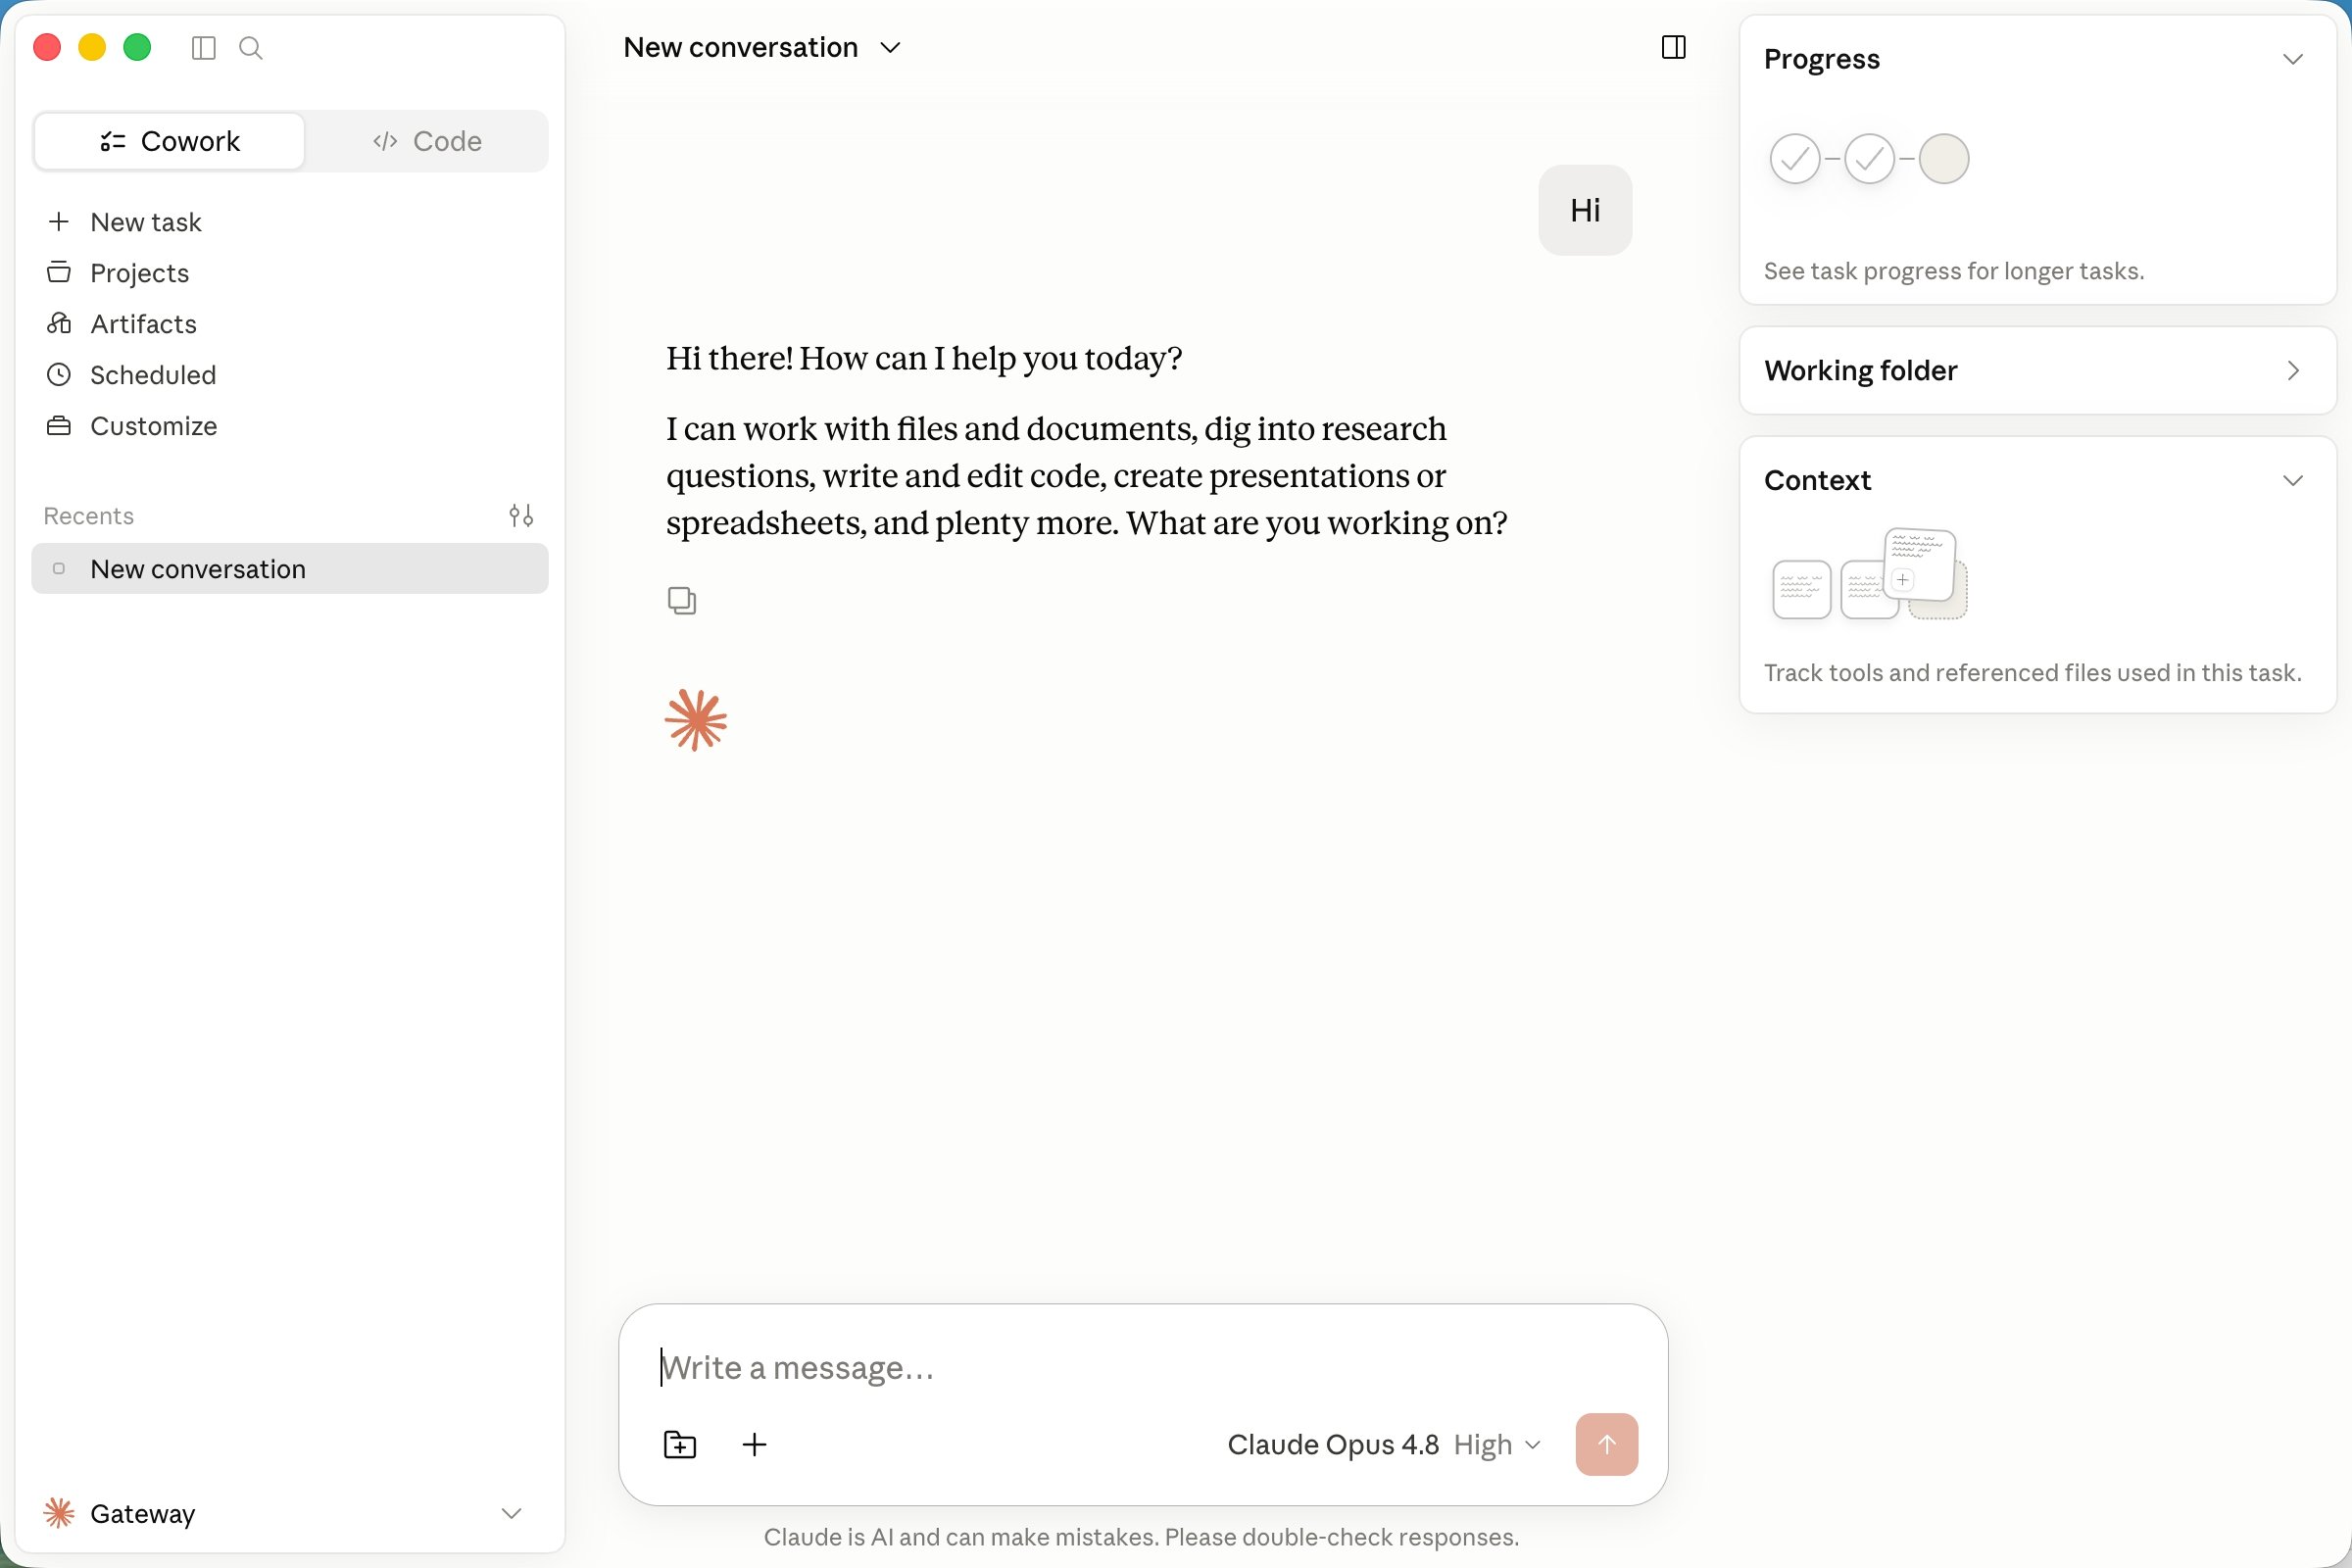
Open the **Claude Desktop App**, and you're ready to start using it! 🚀
Done! You can now use Claude Code for VS Code.
**Enable Virtualization on Windows**
Cowork runs in a virtualized environment. On Windows, you must enable the **Virtual Machine Platform** feature first; otherwise, Cowork will not work properly after installation.
Open **PowerShell** as an administrator and run the following command, then restart your computer:
```powershell theme={null}
Enable-WindowsOptionalFeature -Online -FeatureName VirtualMachinePlatform -All -NoRestart
```
Open the **Claude Desktop App**, and you're ready to start using it! 🚀
 # **Troubleshooting**
Make sure your API input is correct. Due to the high token consumption of Anthropic models, the daily free quota may not support this model. Please top up your balance.
Claude Code only supports the Anthropic-format API. \
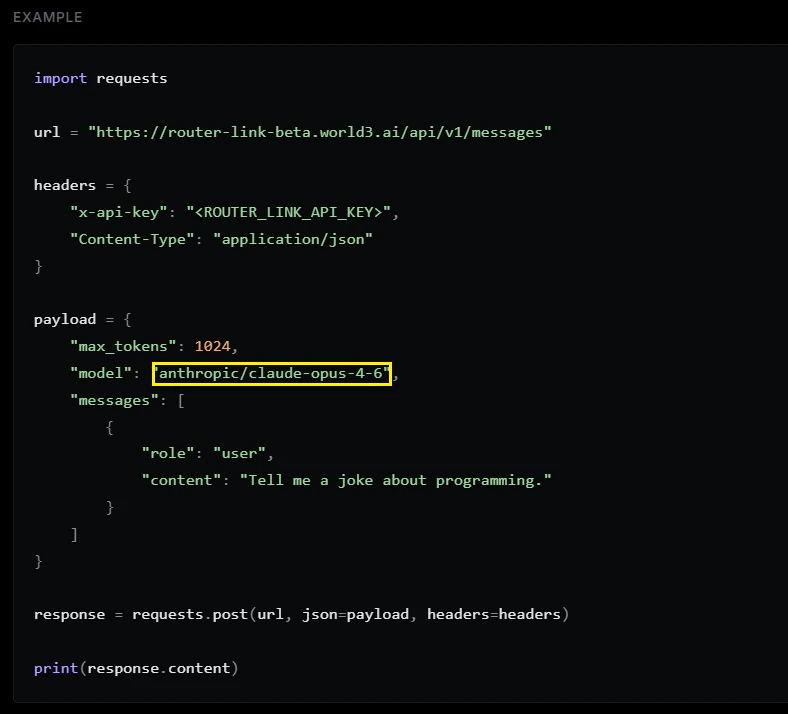
Go to [https://routerlink.ai/models](https://routerlink.ai/models). Click on the model, set the API Format to “Anthropic,” and locate the `model` field in the code block.
Copy the model name from the `model` field and replace it in the `settings.json` file above.
# **Troubleshooting**
Make sure your API input is correct. Due to the high token consumption of Anthropic models, the daily free quota may not support this model. Please top up your balance.
Claude Code only supports the Anthropic-format API. \
Go to [https://routerlink.ai/models](https://routerlink.ai/models). Click on the model, set the API Format to “Anthropic,” and locate the `model` field in the code block.
Copy the model name from the `model` field and replace it in the `settings.json` file above.
 Open a new terminal window. Run `claude` to start Claude Code. Then enter `/model` to switch the model, and finally type `/status` to verify the model status.
 If you have manually edited the `~/.claude/settings.json` file but the changes are not applied, please try the following:
1. Close all Claude Code windows. Open a new terminal window and run `claude` again to restart.
2. If the issue persists, try deleting the `~/.claude/settings.json` file and reconfigure the environment variables. Claude Code will automatically generate a new configuration file.
3. Make sure the JSON format of the configuration file is correct. Check for issues such as incorrect variable names, missing commas, or extra commas. You can use an online JSON validator to verify the file.
Enter the following command in the terminal:
```shellscript theme={null}
claude update
```
Please check [the official documentation](https://support.claude.com/en/articles/12386420-claude-code-faq).
If you have manually edited the `~/.claude/settings.json` file but the changes are not applied, please try the following:
1. Close all Claude Code windows. Open a new terminal window and run `claude` again to restart.
2. If the issue persists, try deleting the `~/.claude/settings.json` file and reconfigure the environment variables. Claude Code will automatically generate a new configuration file.
3. Make sure the JSON format of the configuration file is correct. Check for issues such as incorrect variable names, missing commas, or extra commas. You can use an online JSON validator to verify the file.
Enter the following command in the terminal:
```shellscript theme={null}
claude update
```
Please check [the official documentation](https://support.claude.com/en/articles/12386420-claude-code-faq).